


This is not the article I was originally going to post as #9 in this series. That article will go up as #10. Before I get into OpenGL ES 2.0 and shaders, though, I want to talk about something more fundamental: animation.
But, how do you handle more complex animations? Say you want to make a figure walk, or a ball squish as it bounces?
It's actually not that hard. There are two main approaches to animation in OpenGL: keyframe animations and skeletal (or bone) based animations. In this installment, we'll be talking about keyframe animations, and in the next article (#9b), we'll look at skeletal animation.
Animation is nothing more than change in the position of vertices over time. That's it. When you translate, rotate, or scale an entire object, you are moving all of the vertices that make up one object proportionally. If you want to animate an object in more complex and subtle ways, you need a way to move each vertex different amounts over time.
The basic mechanism used in both types of animation is to store key positions for each vertex in an object. In keyframe animation, this is done by storing the individual position of every vertex for each key. For skeletal animation, it's done by storing the position of virtual bones, with some way to denote which bone affect the movement of which vertices.
So, what are keys? The easiest way to explain them is to go back to their origin, which is in traditional cel animation like the classic (pre-computer) Disney and Warner Brothers cartoons. In the earliest days of animation, small teams would do all the drawings that made up a short. But as the productions got larger, that became impossible, and they had to start specializing into different roles. More experienced animators took on the role of lead animator (sometimes called a key animator). These more experienced animators would not draw every cell in a scene, instead, they would draw the most important frames. These would usually be the extremes of motion, or poses that captured the essence of the scene. If they were animating a character throwing a ball, they might draw, perhaps, the frame where the arm was the furthest back, then a frame where the arm is at the top of the arc, then a third frame where the character released the ball.
Then, the key animator would move on to a new scene and another animator called an in-betweener (sometimes called a rough in-betweener, since it would often be another completely different person's job to clean up the in-betweener's drawings) would then figure out how much time there was between these key frames, then do all the intermediate drawings. If the throw was a one-second throw, and they were animating at twelve frames per second, they would have to figure out how to add an additional nine frames between the existing keyframes drawn by the lead animator.
The concept in three dimensional keyframe animation is exactly the same. You will have vertex data for the key positions in a motion, and your rough in-betweener will be an algorithm called interpolation.
Interpolating is some of the simplest math that you'll do in three-dimensional graphics. For each of the cartesian dimensions (x,y,z), you simply take the difference between the two keyframe values, figure out how much of the total animation time has elapsed, and divide the difference by that fractional portion.
It might make more sense if we do a practical example. Let's just look at one vertex. In our first keyframe, let's pretend that it's at the origin (0, 0, 0). For the second keyframe, we'll assume it's at (5, 5, 5), and the duration between these two keyframes if five seconds (just to keep the math nice and simple).
If we're one second into the animation, we just figure out the difference between the two vertices for each axis. So, in our case, the total movement between the two keyframes if five units on each of the x, y, and z axes (five minus zero equals five). So, if we're one second into our five second animation, we're 1/5th of the way through, so we add 1/5th of five to the first keyframe's x, y, and z values, to come up with a position of (1, 1, 1). Now, the numbers won't usually work out that nicely, but the math is exactly the same. Figure out the difference, then figure out based on the time elapsed what percentage of the way through this action we are, multiply the difference on each axis by that fraction, and then add the result to the first key frame's value for that axis.
This is the simplest form of interpolation, called straight line interpolation and it's just fine for most purposes. There are more complex algorithms that weight the interpolation based on how far into the animation you are. Core Animation, for example, provides the option to "ease in", "ease out", or "ease in/out" when performing an animation. Perhaps we'll cover non-straight-line interpolation in a future article, but for today, we're just going to keep things simple and work with straight-line interpolation. You can do the vast majority of what you want with this technique just by altering the number of keyframes and duration between them
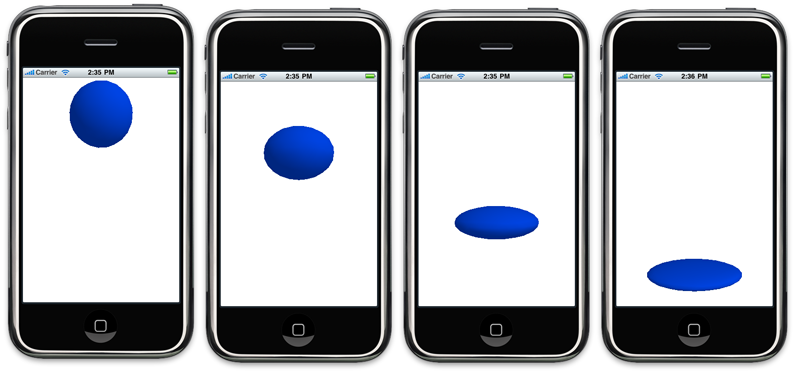
Let's look at a really simple example of animation in OpenGL ES. When traditional hand-drawn animators are trained, the first thing they do is animate a bouncing ball that squishes as it bounces. It only seems fitting for us to do the same thing, so here's what our app is going to look like:
Let's start by creating a ball in Blender (or any 3D program you want to use, if you've got a way to export the vertex and normal data in a useable manner. In this example, I'm going to use my Blender export script, which generates header files with the vertex data.
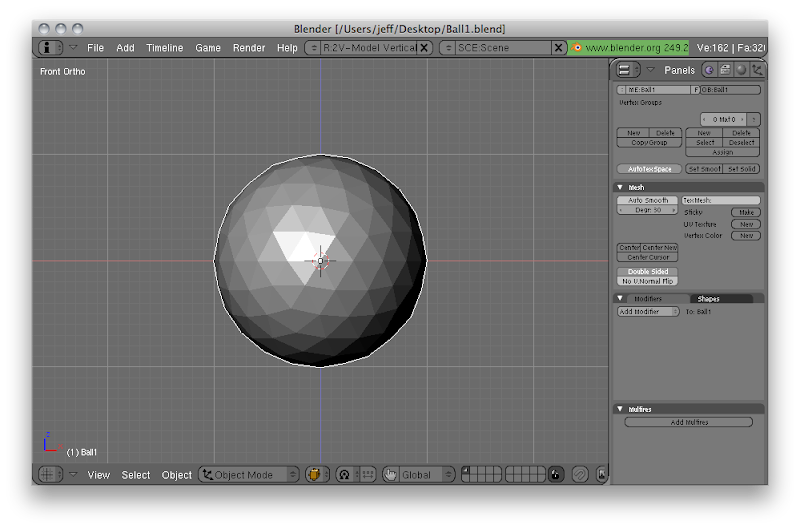
I start by creating an icosphere at the origin. I rename the mesh to Ball1, then I save this file as Ball1.blend and export Ball1.blend using my export script. You can find my Blender file for this keyframe here.
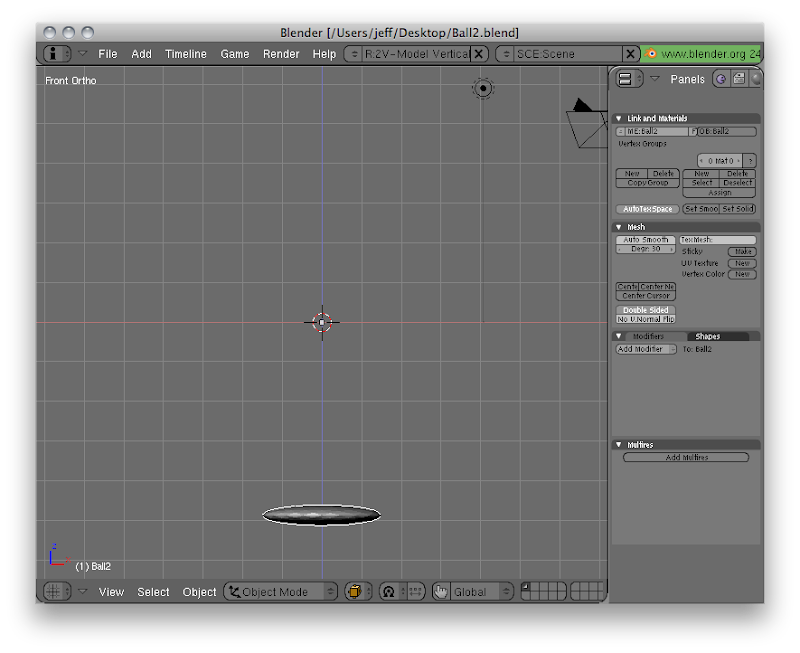
Now, I do a save-as (F2) and save a copy of the file as Ball2.blend. In this copy, I rename the mesh Ball2 so that the export script uses different names for the data structures. Then I hit 'tab' to go into edit mode, press 'A' and move and scale the ball's vertices so that it's moved down and is squished. I save the squished ball and export Ball2.h. You can find my Blender file for the second keyframe here.
At this point, I have two .h files, each containing the vertex positions for one keyframe in my animation. Working from my OpenGL ES template, I first define a few values in GLViewControler.h to help me keep track of the animation:
Since I will be bouncing back and forth between the two keyframes, I need to keep track of whether it's traveling forward or backward. I also set a value to control how fast it moves between the two keyframes.
Then, in GLViewController.m, I interpolate between the two keyframes repeatedly, like so (don't worry, I'll explain):
First, I start out with some setup. I create a static variable to keep track of when we hit the last keyframe. This will be needed to determine how much time has elapsed. The first time through, we initialize it to the current time, then we declare a variable for keeping track of whether we're animating forward or backward.
After that, we do normal OpenGL ES stuff. The only thing of note here is that we rotate -90° on the X-axis. We're accounting for the fact that OpenGL ES uses a Y-up coordinate system and Blender uses a Z-up. We could also have rotated in Blender instead.
Next, I declare a static array to hold the interpolated data:
Just to keep things simple, I set a color and enable color materials. I didn't want to clutter this example up with texture or materials.
Now I calculate how much time has elapsed since the last keyframe. If the time elapsed is greater than the animation duration, we flip the direction around so that we're going the other way.
In order to accommodate bi-directional animation, I declare two pointers to the source keyframe data and destination keyframe data, and point each one to the appropriate data array based on the direction we're currently going.
And, finally, the interpolation. Here's a fairly generic implementation of that linear interpolation we were talking about:
Then, all that's left to do is to do cleanup work.
Not that hard, right? It's just division, multiplication, and addition. Compared to some of the stuff we've been through so far, this is nothing. This is the basic technique used, for example, in the MD2 file format used by Id in their older games. Every animation used is performed using keyframe animation, just like I've done here. Later versions of Milkshape support other file formats, but you can do some pretty sophisticated animations using keyframes.
If you want to check out the bouncy ball, you can download my Xcode project and run it for yourself.
Not all 3D animation is done using keyframes, but interpolation is the basic mechanism that enables all complex animation. Stay tuned for the next installment, #9b, where we use interpolation to implement a far more complex form of animation called skeletal animation.
Note:You can find the source code that accompanies this article here. A new version was uploaded at 10:14 Eastern time that fixed a problem with it not animating (see comments for details).Now, you've already seen the most basic form of animation in OpenGL ES. By changing the rotate, translate, and scale transformations over time, we can animation objects. Our very first project — the spinning icosahedron - was an example of this form of animation, often called simple animation. Don't let the name fool you, though, you can do quite complex animations using nothing more changing matrix transformations over time.
But, how do you handle more complex animations? Say you want to make a figure walk, or a ball squish as it bounces?
It's actually not that hard. There are two main approaches to animation in OpenGL: keyframe animations and skeletal (or bone) based animations. In this installment, we'll be talking about keyframe animations, and in the next article (#9b), we'll look at skeletal animation.
Interpolation & Keys
Animation is nothing more than change in the position of vertices over time. That's it. When you translate, rotate, or scale an entire object, you are moving all of the vertices that make up one object proportionally. If you want to animate an object in more complex and subtle ways, you need a way to move each vertex different amounts over time.
The basic mechanism used in both types of animation is to store key positions for each vertex in an object. In keyframe animation, this is done by storing the individual position of every vertex for each key. For skeletal animation, it's done by storing the position of virtual bones, with some way to denote which bone affect the movement of which vertices.
So, what are keys? The easiest way to explain them is to go back to their origin, which is in traditional cel animation like the classic (pre-computer) Disney and Warner Brothers cartoons. In the earliest days of animation, small teams would do all the drawings that made up a short. But as the productions got larger, that became impossible, and they had to start specializing into different roles. More experienced animators took on the role of lead animator (sometimes called a key animator). These more experienced animators would not draw every cell in a scene, instead, they would draw the most important frames. These would usually be the extremes of motion, or poses that captured the essence of the scene. If they were animating a character throwing a ball, they might draw, perhaps, the frame where the arm was the furthest back, then a frame where the arm is at the top of the arc, then a third frame where the character released the ball.
Then, the key animator would move on to a new scene and another animator called an in-betweener (sometimes called a rough in-betweener, since it would often be another completely different person's job to clean up the in-betweener's drawings) would then figure out how much time there was between these key frames, then do all the intermediate drawings. If the throw was a one-second throw, and they were animating at twelve frames per second, they would have to figure out how to add an additional nine frames between the existing keyframes drawn by the lead animator.
The concept in three dimensional keyframe animation is exactly the same. You will have vertex data for the key positions in a motion, and your rough in-betweener will be an algorithm called interpolation.
Interpolating is some of the simplest math that you'll do in three-dimensional graphics. For each of the cartesian dimensions (x,y,z), you simply take the difference between the two keyframe values, figure out how much of the total animation time has elapsed, and divide the difference by that fractional portion.
It might make more sense if we do a practical example. Let's just look at one vertex. In our first keyframe, let's pretend that it's at the origin (0, 0, 0). For the second keyframe, we'll assume it's at (5, 5, 5), and the duration between these two keyframes if five seconds (just to keep the math nice and simple).
If we're one second into the animation, we just figure out the difference between the two vertices for each axis. So, in our case, the total movement between the two keyframes if five units on each of the x, y, and z axes (five minus zero equals five). So, if we're one second into our five second animation, we're 1/5th of the way through, so we add 1/5th of five to the first keyframe's x, y, and z values, to come up with a position of (1, 1, 1). Now, the numbers won't usually work out that nicely, but the math is exactly the same. Figure out the difference, then figure out based on the time elapsed what percentage of the way through this action we are, multiply the difference on each axis by that fraction, and then add the result to the first key frame's value for that axis.
This is the simplest form of interpolation, called straight line interpolation and it's just fine for most purposes. There are more complex algorithms that weight the interpolation based on how far into the animation you are. Core Animation, for example, provides the option to "ease in", "ease out", or "ease in/out" when performing an animation. Perhaps we'll cover non-straight-line interpolation in a future article, but for today, we're just going to keep things simple and work with straight-line interpolation. You can do the vast majority of what you want with this technique just by altering the number of keyframes and duration between them
Keyframe Animation in OpenGLES
Let's look at a really simple example of animation in OpenGL ES. When traditional hand-drawn animators are trained, the first thing they do is animate a bouncing ball that squishes as it bounces. It only seems fitting for us to do the same thing, so here's what our app is going to look like:
Let's start by creating a ball in Blender (or any 3D program you want to use, if you've got a way to export the vertex and normal data in a useable manner. In this example, I'm going to use my Blender export script, which generates header files with the vertex data.
I start by creating an icosphere at the origin. I rename the mesh to Ball1, then I save this file as Ball1.blend and export Ball1.blend using my export script. You can find my Blender file for this keyframe here.
Now, I do a save-as (F2) and save a copy of the file as Ball2.blend. In this copy, I rename the mesh Ball2 so that the export script uses different names for the data structures. Then I hit 'tab' to go into edit mode, press 'A' and move and scale the ball's vertices so that it's moved down and is squished. I save the squished ball and export Ball2.h. You can find my Blender file for the second keyframe here.
At this point, I have two .h files, each containing the vertex positions for one keyframe in my animation. Working from my OpenGL ES template, I first define a few values in GLViewControler.h to help me keep track of the animation:
enum animationDirection ;
typedef BOOL AnimationDirection;Since I will be bouncing back and forth between the two keyframes, I need to keep track of whether it's traveling forward or backward. I also set a value to control how fast it moves between the two keyframes.
Then, in GLViewController.m, I interpolate between the two keyframes repeatedly, like so (don't worry, I'll explain):
- (void)drawView:(UIView *)theView
First, I start out with some setup. I create a static variable to keep track of when we hit the last keyframe. This will be needed to determine how much time has elapsed. The first time through, we initialize it to the current time, then we declare a variable for keeping track of whether we're animating forward or backward.
static NSTimeInterval lastKeyframeTime = 0.0;
if (lastKeyframeTime == 0.0)
lastKeyframeTime = ;
static AnimationDirection direction = kAnimationDirectionForward;After that, we do normal OpenGL ES stuff. The only thing of note here is that we rotate -90° on the X-axis. We're accounting for the fact that OpenGL ES uses a Y-up coordinate system and Blender uses a Z-up. We could also have rotated in Blender instead.
// Blender uses Z-up, not Y-up like OpenGL ESNext, I declare a static array to hold the interpolated data:
static VertexData3D ballVertexData;Just to keep things simple, I set a color and enable color materials. I didn't want to clutter this example up with texture or materials.
Now I calculate how much time has elapsed since the last keyframe. If the time elapsed is greater than the animation duration, we flip the direction around so that we're going the other way.
NSTimeInterval timeSinceLastKeyFrame = - lastKeyframeTime;
if (timeSinceLastKeyFrame > kAnimationDuration)
NSTimeInterval percentDone = timeSinceLastKeyFrame / kAnimationDuration;In order to accommodate bi-directional animation, I declare two pointers to the source keyframe data and destination keyframe data, and point each one to the appropriate data array based on the direction we're currently going.
VertexData3D *source, *dest;
if (direction == kAnimationDirectionForward)
else
And, finally, the interpolation. Here's a fairly generic implementation of that linear interpolation we were talking about:
for (int i = 0; i < kBall1NumberOfVertices; i++)
Then, all that's left to do is to do cleanup work.
}
Not that hard, right? It's just division, multiplication, and addition. Compared to some of the stuff we've been through so far, this is nothing. This is the basic technique used, for example, in the MD2 file format used by Id in their older games. Every animation used is performed using keyframe animation, just like I've done here. Later versions of Milkshape support other file formats, but you can do some pretty sophisticated animations using keyframes.
If you want to check out the bouncy ball, you can download my Xcode project and run it for yourself.
Not all 3D animation is done using keyframes, but interpolation is the basic mechanism that enables all complex animation. Stay tuned for the next installment, #9b, where we use interpolation to implement a far more complex form of animation called skeletal animation.
0 comments:
Post a Comment